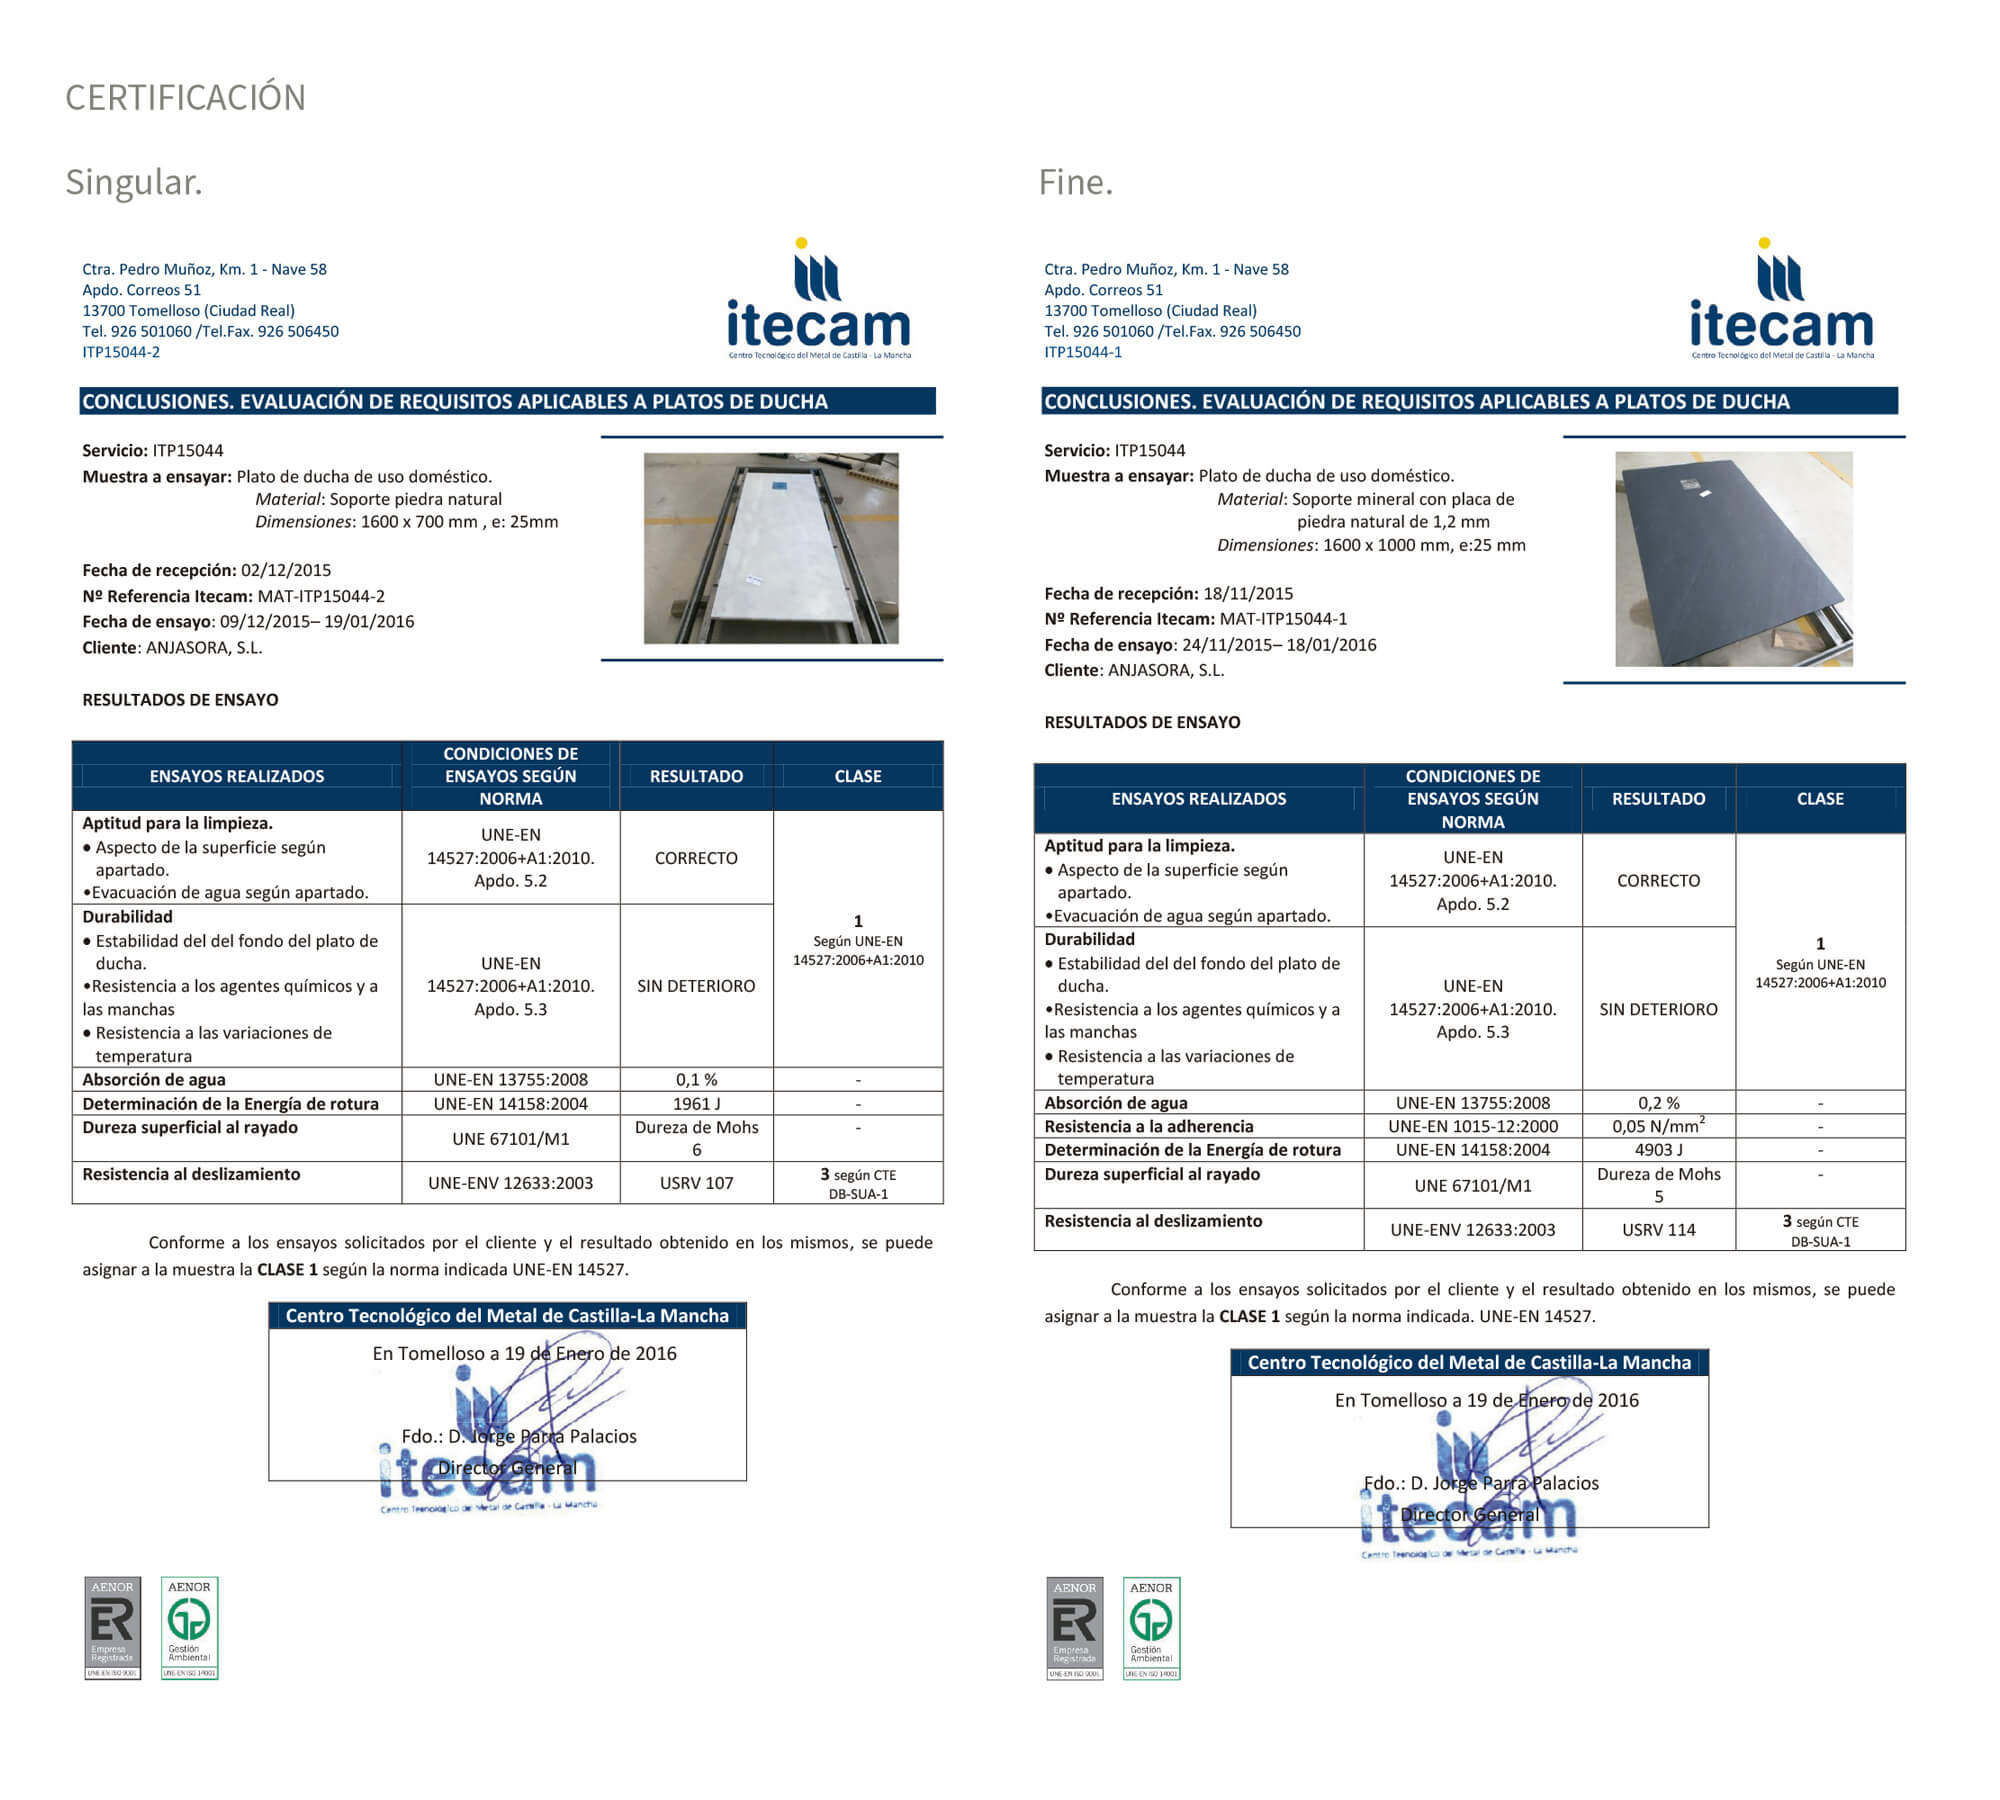
SINGULAR
All Singular shower trays have the option of a grid in the same finish as the shower tray

All Singular trays are available with the finishes BR, CA, PL and TR.
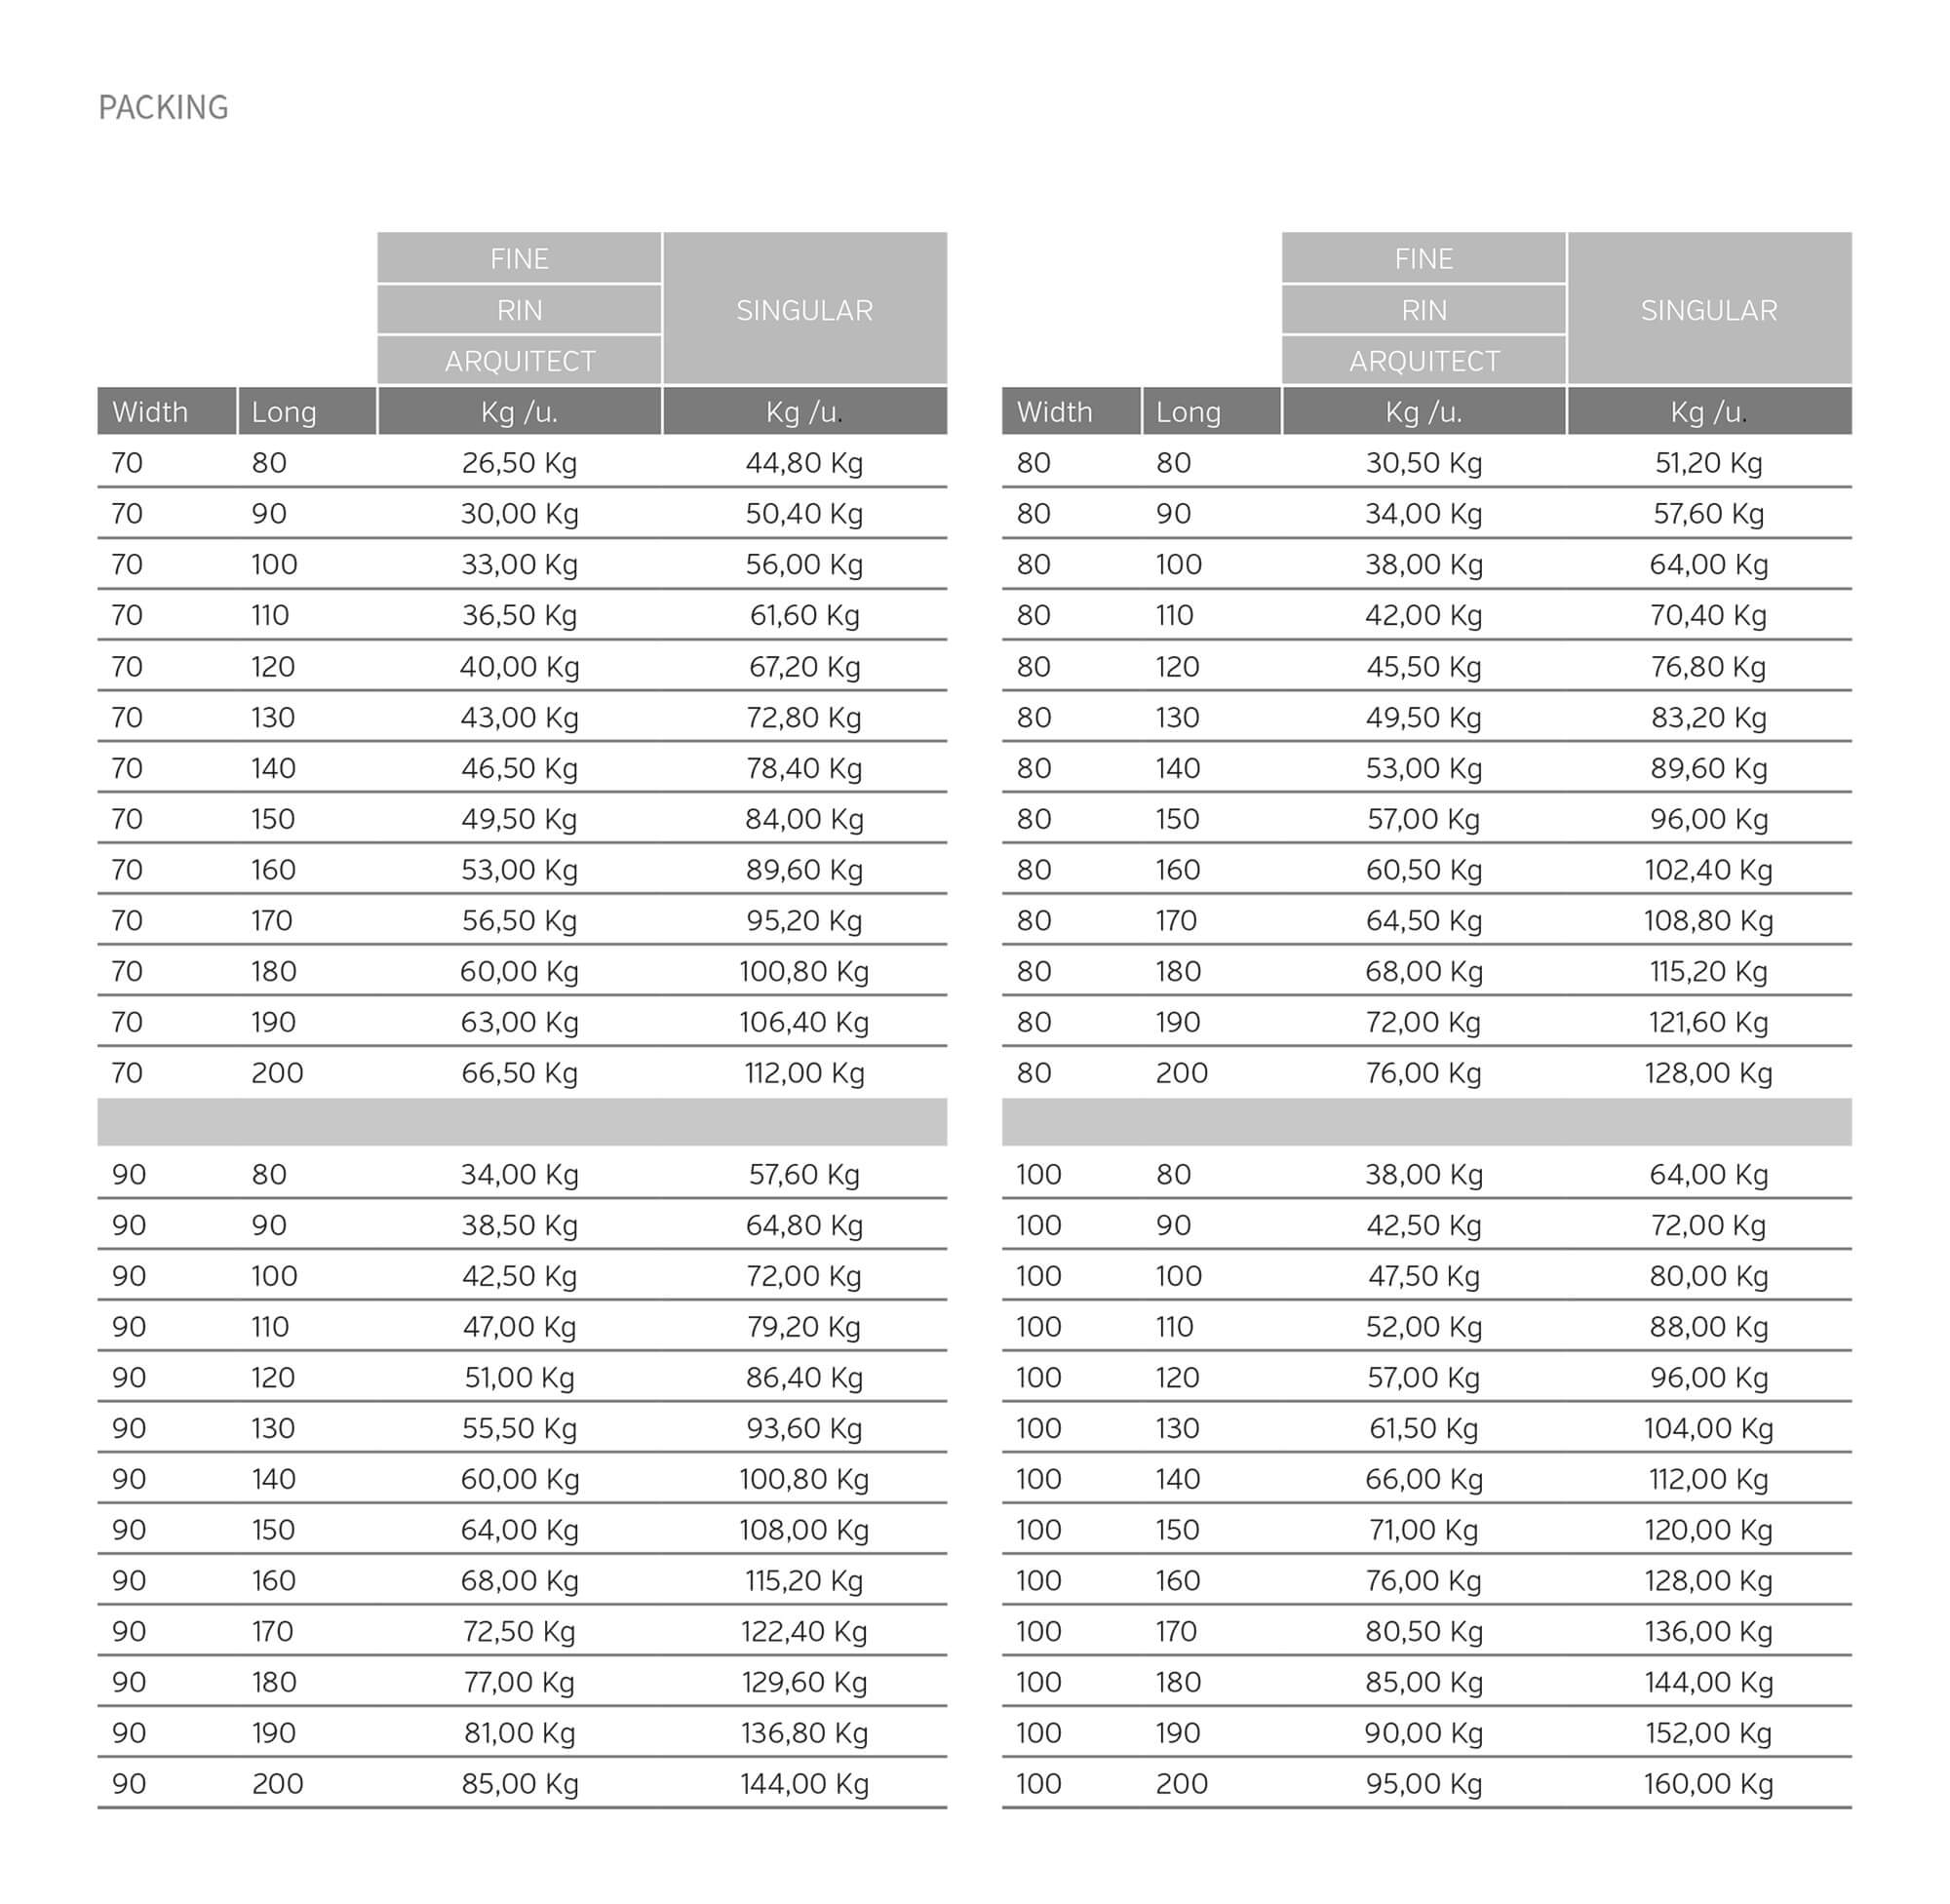
All Singular shower trays are manufactured in standard sizes of 70-100cm wide and 80-200cm long.
Also in personalized measure.

SINGULAR MARENGO CA
75x150x3

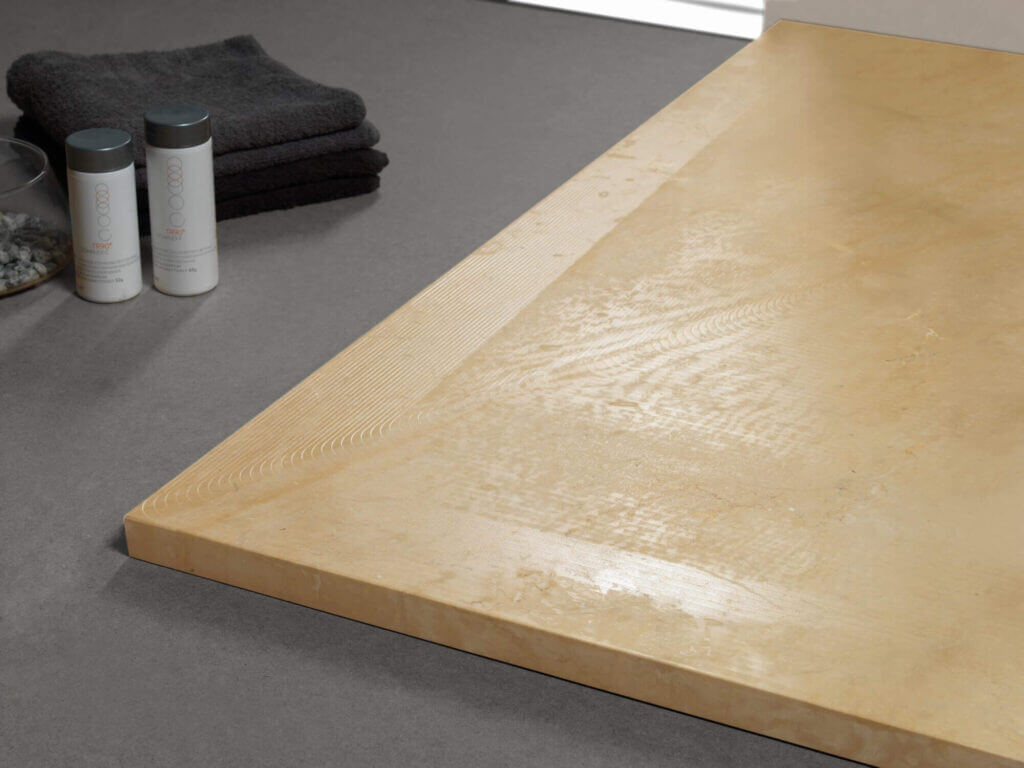
SINGULAR BEIGE BR
100x150x3

SINGULAR GRAY PL
80x80x3

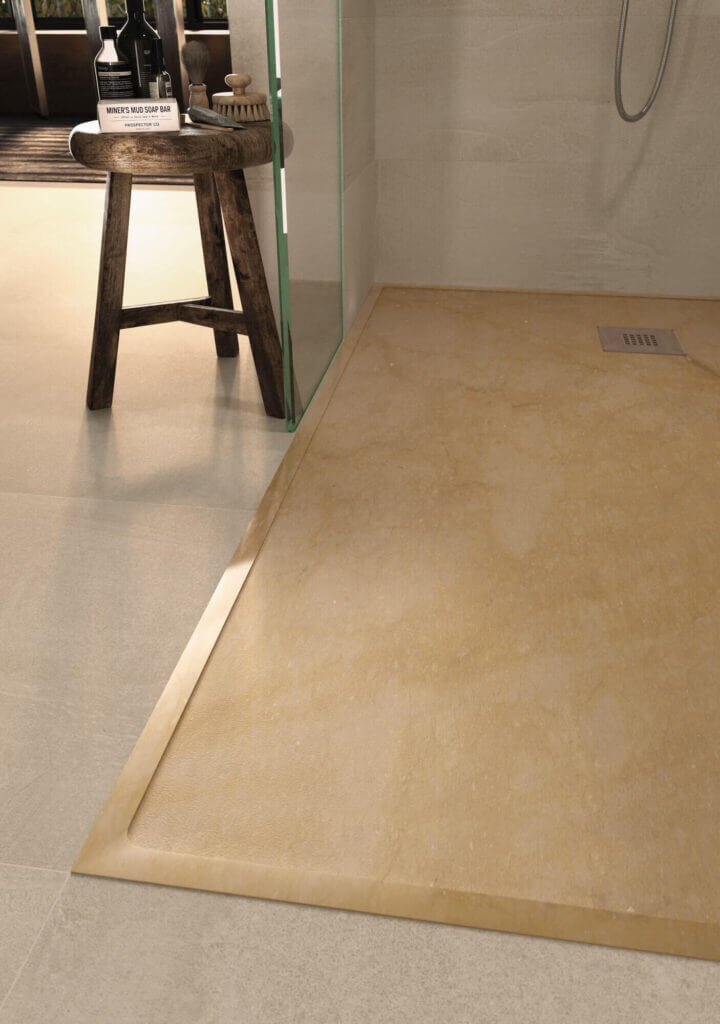
SINGULAR CREAM PL TR
90x120x3

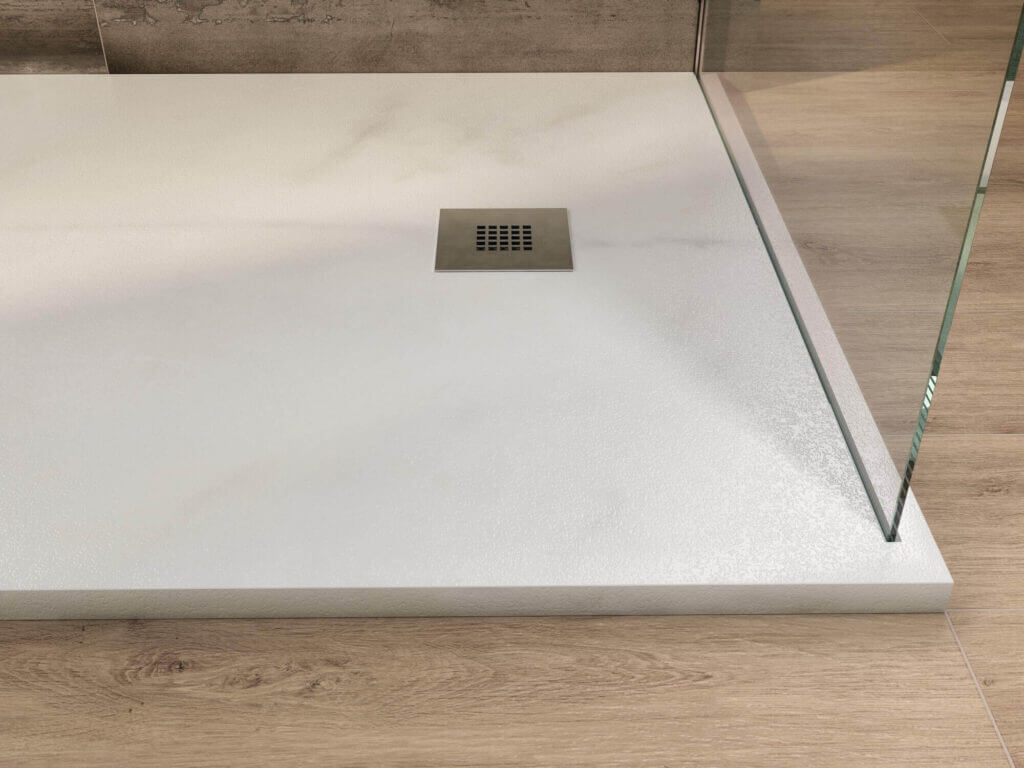
SINGULAR WHITE PL
75x150x3

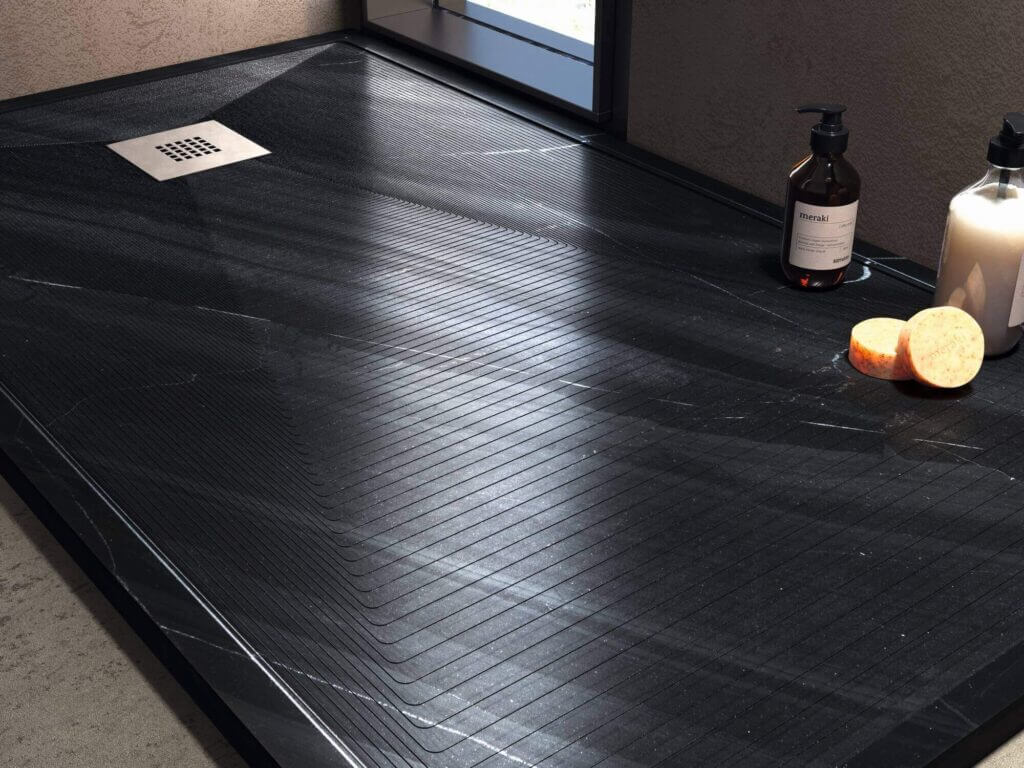
SINGULAR BLACK BR TR
90x120x3
SETTING
Singular offers 5 configuration levels according to:
A. Type of surface.
B. Plate dimensions.
C. Type of drain.
D. Location of glass or screen.
E. Location of the plate with respect to the ground.
A
All Singular trays are available in the finishes BR, CA, TR, PL.

BR. tapered edge.

AC. Fall from scratch.

PL. Flat.

TR. Striped Triangular.
B.
Available sizes range from 70 to 100 cm wide and 70 to 200 long (at 10 cm intervals).
It is also made to measure and with personalized necklines.

X.70/80/90/100
Y. 70/80/90/100/110…./200
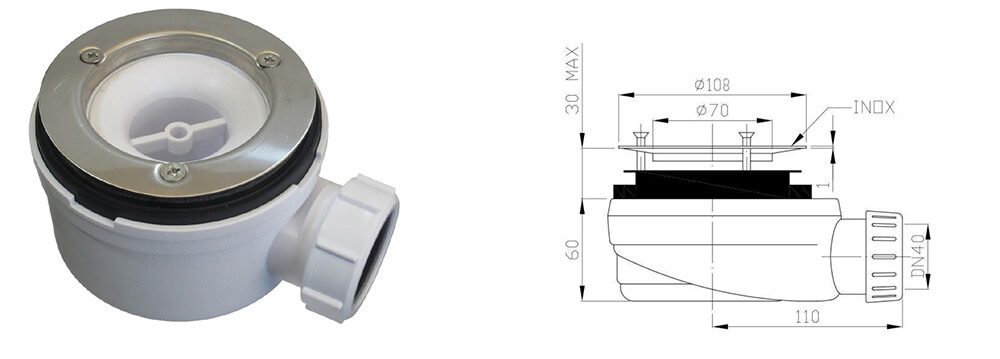
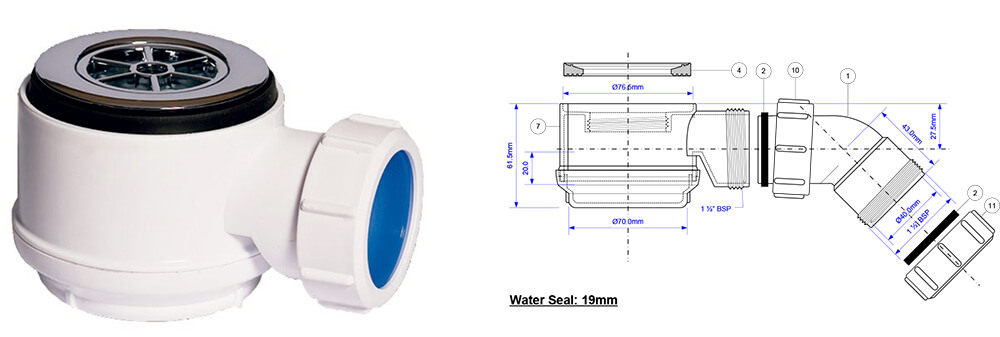
C
The location of the drain can also vary and the type of grate can be CU or TR.

CU:

TR:

OPTIONAL: The grid can be made of the same material as the tray (see previous page).
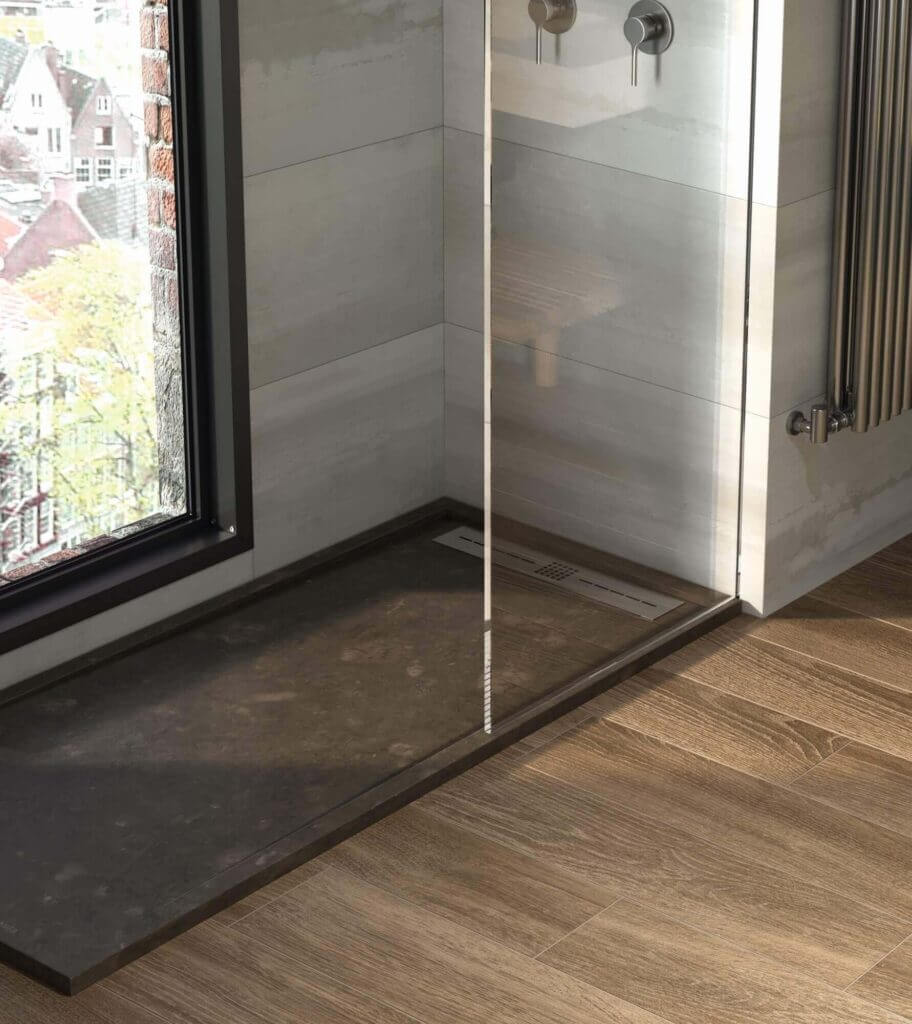
D
The crystal can be located in three different ways:

A. On the plate.

B. Next to the plate.

C. Embedded.
AND
The dishes have three placement options with respect to the ground.

A: On the ground.

B: At ground level.

C: High.